Appendix A - The UM245R conversion module
|
The UM245R USB FIFO module is newer than the original USB245M moudle that the USB DMX Interface PCB was originaly designed for. It uses the same drivers, but also supports the new FTDIChip-ID security dongle feature. A unique number (the FTDIChip-ID) is burnt into the device during manufacture and is readable over USB. This means that for commerical applications it would be possible to lock an application to a specific USB DMX Interface.
In addition the conversion PCB includes soft start circuitry, which removes a sometimes seen issue whereby som random characters are generated in the USB port when the USB DMX Interface is first plugged in.
As with the main PCB, you should first check the PCB over and familierise with the layout.
|
|
|
The PCB
|
|
|
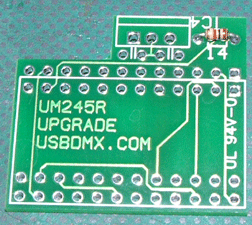
The order that you build this module is quite important, and some components over lap each other. Thus making it extremely difficult, if not impossible, to complete. Firstly you should solder in the resistor R14 (1K). After this you must solder the first of the PCB pins on the side furthest away from the resistor. Please see the picture below to make sure you use the correct set of holes.
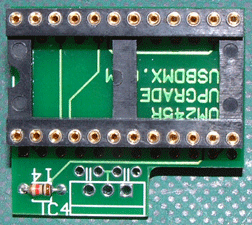
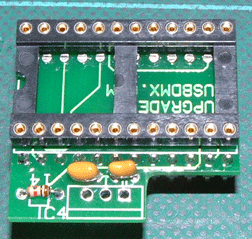
Once the first set of PCB Pins are in place, you should fit the IC socket that will hold the UM245R module. After this is complete you may add the second row of PCB pins, and then the capacitors C8 and C9 (100nf).
|
|
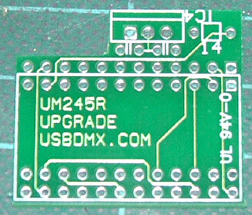
The Resistor fitted
|
|
|
|
|
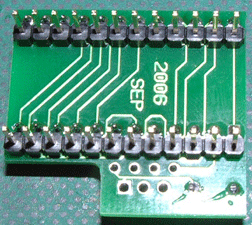
First row of PCB pins
|
|
|
|
|
The IC Socket fitted
|
|
|
|
|
Second row of PCB pins
|
|
|
|
|
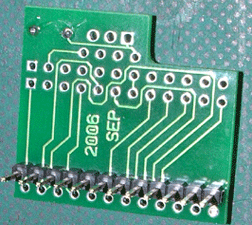
The Finished module
|
|
|
The finished conversino module fits into the main 1.3 PCB in pace of the IC socket to hold the USB245M module.
IMPORTANT:IC4 is soldered both to the conversion module and to the main PCB.
You will probably find it a lot easier to first solder IC4 onto the conversion PCB, and then solder it and the conversino PCB to the main 1.3 PCB.
|

