Step 5 - Fitting the remaining components
You will need to solder IC4 & IC5 onto the PCB. The flat metal part of IC5 lines up with the marking on the PCB (that is facing away from IC2).
If you building the 1.2 PCB or using the 1.3 PCB without the case you will also need to fit the DMX connector. If on the other hand you are building the 1.3 PCB to go in the case you will need to fit IC3 and the XLR connector.
Please NOTE: If you order a kit of parts, I will be supplying a UM245R module instead of the USB245M module. As the newer UM245R module is not pin compatible I also supply a conversion PCB and parts. It is very important that you read Appendix A first, as this changes the order you must build the kit in.
|
|
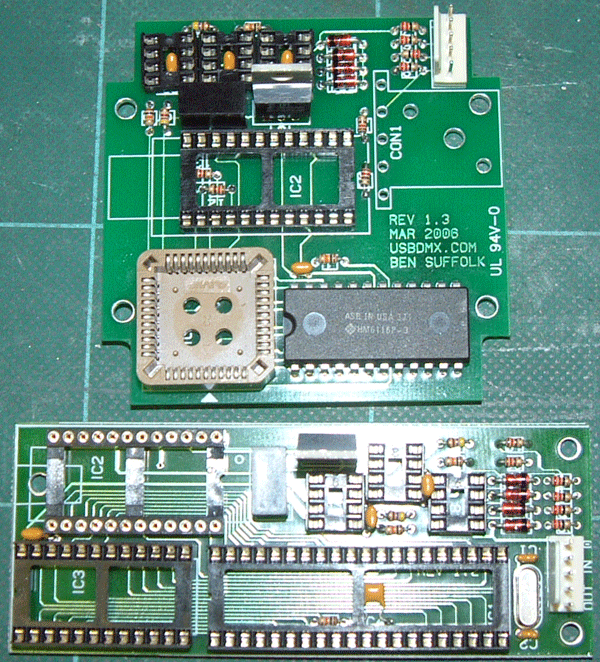
PCB with remaining components and header pins fitted for mounting.
|
|
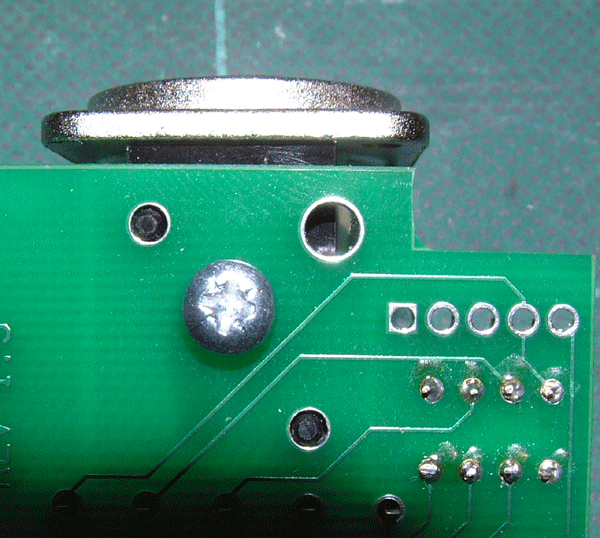
When fitting the XLR socket to the revision 1.3 PCB you wil first need to screw the connector to the PCB using an 8mm M3 screw, then you may solder it to the PCB.
|
|
Attatching the XLR socket with an M3 screw.
|
|
Once you have finished soldering, throughly check that you have not bridged any tracks, or pins together, and that you have no dry joints.

